I'll explain how to setup a workflow for your Eleks maker lazer engraver on Ubuntu using only open source softwares. In the end, you'll be able to lazer engrave stuff using GCode.
Before we begin, it's important to mention that the software we'll be using can ONLY send GCode to the lazer engraver. This means that (contrary to the Benbox software), you won't be able to just throw an image in, and lazer engrave it with Z passes from left to right, top to bottom. You will have to transfer the image into vector (.svg file) and then transfer it into GCode. This whole process is more fastidious, but gives cleaner results and is almost essential if you plan to lazer engrave your design on many instances (because it's a lot faster).
That being said, here is a summary of what we'll do :
- Install Universal-G-Code-Sender on your computer (to open GCode files and send them to the lazer engraver)
- Flash GRBL into your lazer engraver (so the software above can communicate with the lazer engraver)
- Install the JTech Photonics Inkscape lazer engraver plugin on your computer (to generate GCode)
Step 1 : Install Universal-G-Code-Sender
Download the latest version of it here, unpack it and execute the start.sh file. You must have java installed for it to work (you can type java --version in console to see if it's installed).
Step 2 : Flash GRBL
By default, the lazer engraver comes with the benbox firmware. That's what you are about to replace. Be aware that you would have to flash benbox firmware back if you want to use Benbox again ! In my case I had a spare adruino nano so I could just swap them, but if you don't, I've found this article that explains how to re-install benbox firmware : http://www.instructables.com/id/Benbox-With-Eleks-Laser-Engraver-GearBest-Banggood/#step5 (I haven't tested it tho).
So, the first thing we have to do is move a little jumper located under the adruino Nano itself.
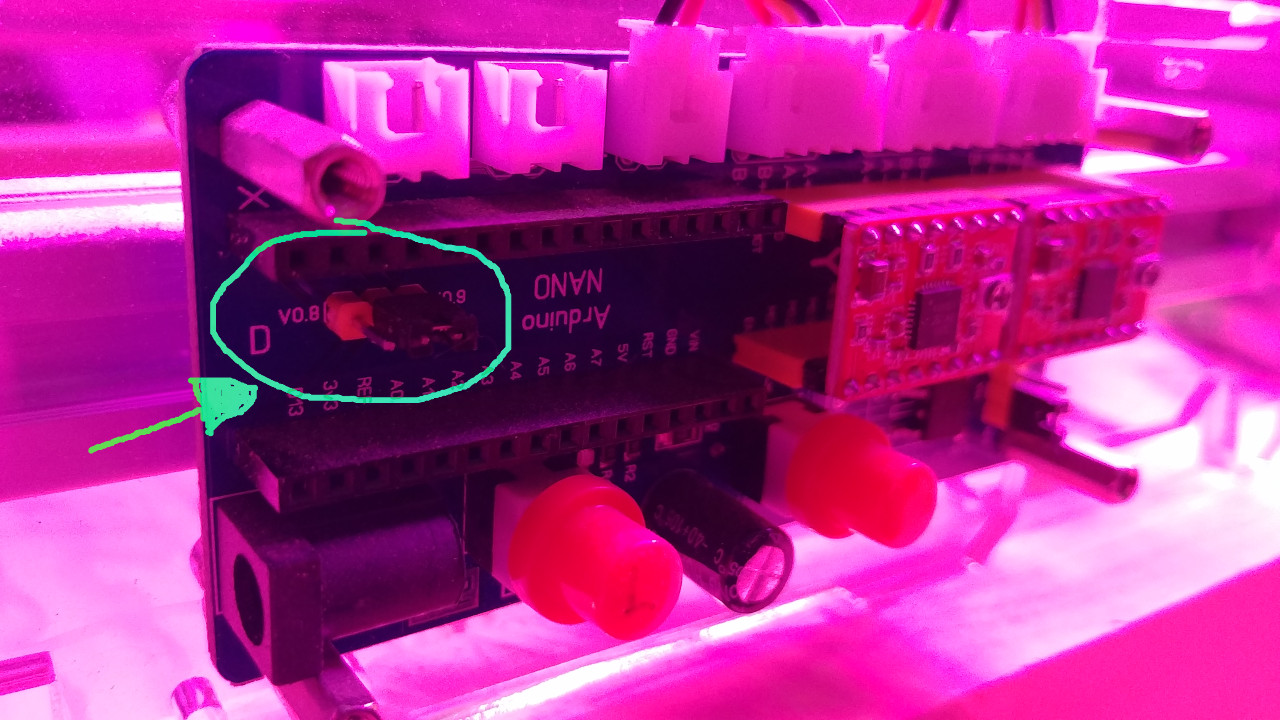
It should be on the far left by default, you need to shift it on the other side like the picture above.
Now you need to download GRBL version 0.9 ! There is a new version (1.1) but it did not work in my case. I think its because the adruino shield is only compatible with version 0.8 or 0.9 (based on what is written on the chip, beside the jumper we just moved).
To flash GRBL into your Adruino Nano, you could use the Adruino IDE or check instructions in the GRBL wiki, but in my case it didn't work well... What worked best was this command :
avrdude -v -patmega328p -Uflash:w:grbl_v0_9j_atmega328p_16mhz_115200.hex:i -carduino -b 57600 -P /dev/ttyUSB0
Using the avrdude cli tool (I think it's installed by default).
grbl_v0_9j_atmega328p_16mhz_115200.hexis the path of the file to flash/dev/ttyUSB0is where your lazer engraver should be mounted
Note that : you must plug in the USB cable of the lazer engraver first, and you can use the Adruino IDE to check where it is mounted.
Step 3 : Install Inkscape plugin
Download it from here and install it.
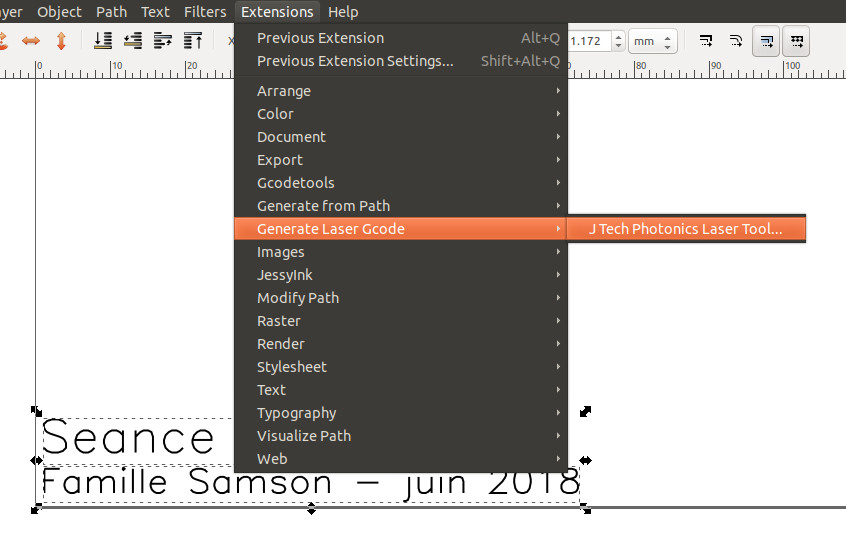
You can now import/create your design into Inkscape. When you are done, select the paths you want to lazer engrave and combine them with Path > Combine (or CTRL + K).
Then open the plugin window in : Extensions > Generate Laser Gcode > J Teck Photonics Laser Tools.... It should look like this :
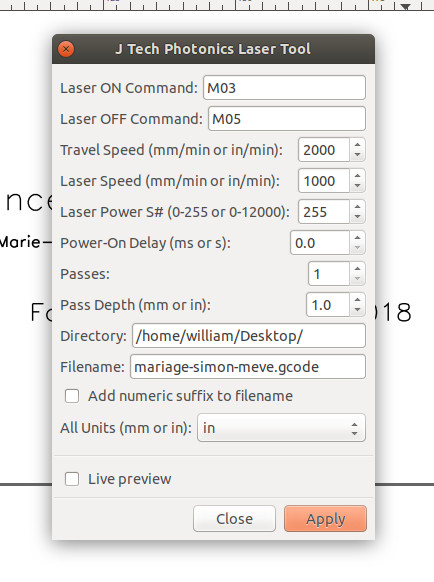
Tweak settings to you needs and click "Apply" to export your design into Gcode (at the path you choosed) and continue to next step.
Linking everything together
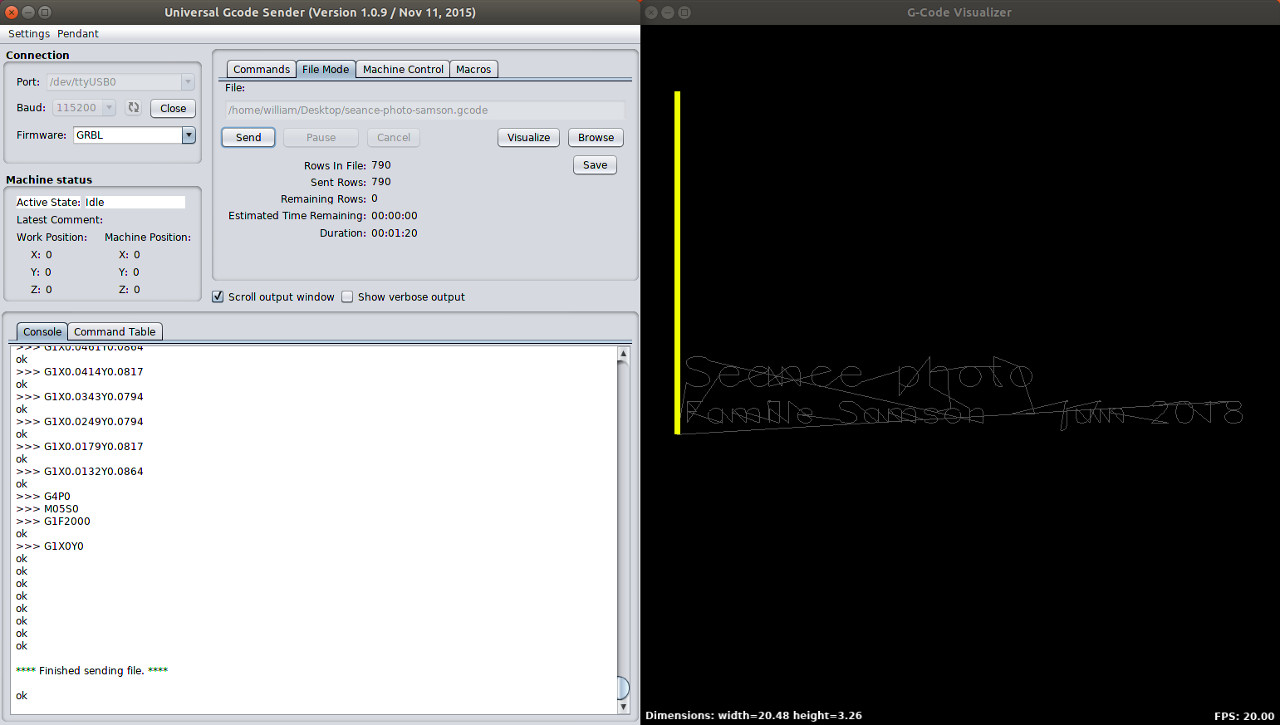
Now that you have a Gcode file in your hands, open it in Universal-G-code-sender. And here is a quick tour of the software :
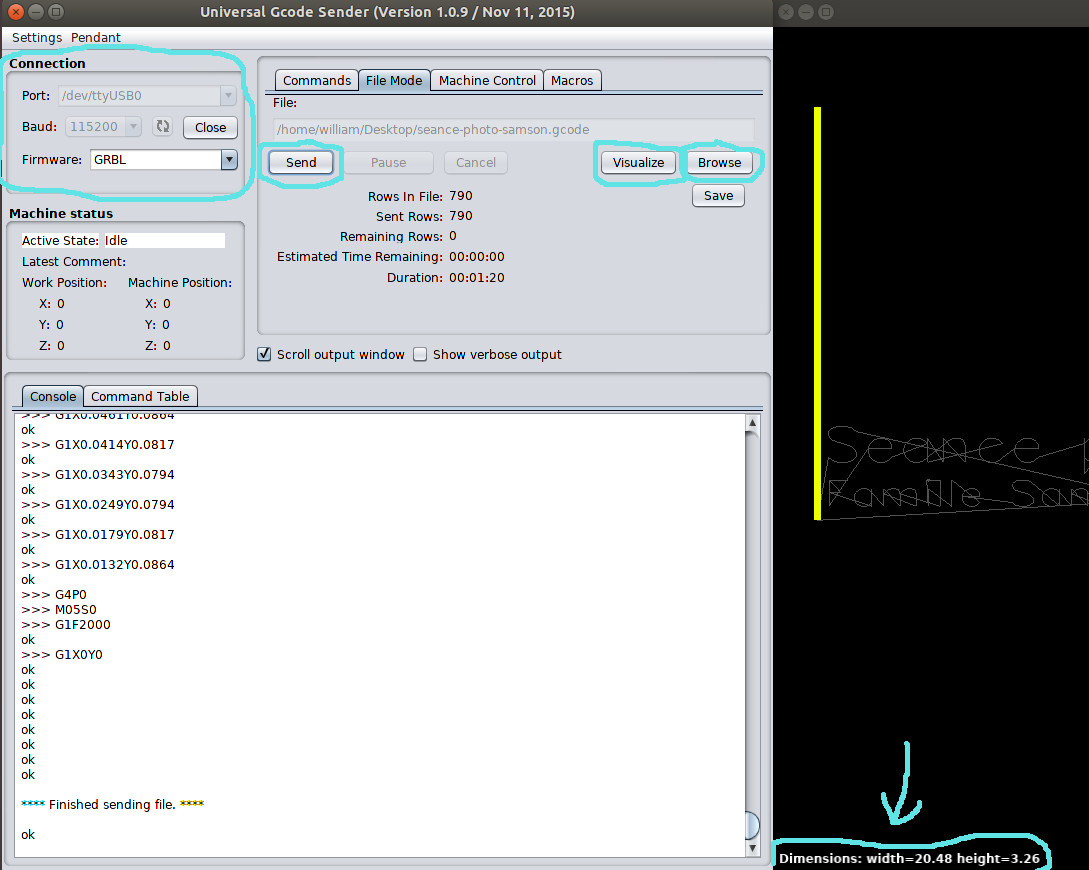
- Connection box (top left) : that's where you connect to your lazer engraver
- When connection is complete, you can open your file with the "Browse" button of the "File Mode" tab.
- "Visualize" will open a window in which you can preview the paths that will be drawn.
- "Send" will actually send the file to the lazer engraver and engrave it !
Important note : I had a lot of trouble finding out how to scale my svg file in Inkscape properly so the final engraving ends up the size I want. And honestly everything I tried never worked... BUT ! I've found that when the dimensions shown in the Visualize window (bottom left corner of it) are 40, it's equivalent to 5 inches. I have no idea which units is this tho...
Well, hope it helps !